How to create a blog on AWS using S3 in 3 easy steps

Why should you care about where to host your blog?
Have you ever had to face any of these issues with your site?
-
Reliability: Frequent downtime leading to bad user experience. There could be many reasons for this such as hardware failures, security issues or application errors.
-
Scalability & Flexibility: Your site went viral but it couldn’t handle the sudden increase in traffic. One of the major reasons for this is that many hosting providers limit the bandwidth and storage you can use.
-
Pricing: Most hosting providers charge a fixed fee every month. If you end up not using all the resources, you overpay for the service.
-
Developer friendly: There is no easy and programmatic way to interact with the underlying infrastructure. You have to manually update your site every time you make changes.
There is good news! Amazon provides a service called Simple Storage Service also known as “S3” that solves a lot of the problems mentioned above.
Amazon S3 is a simple key, value store which can store as many files as you want. These objects are stored in buckets.
You can learn more about Amazon S3 here.
The major benefits of using S3 are:
-
Reliability: S3 guarantees 99.9% uptime and 99.999999999% durability. In other words, your site will be down for at most 45 minutes every month and you will almost never lose any data.
-
Scalability & Flexibility: S3 gives you unlimited storage. There is no cap on storage space and bandwidth. If your site suddenly receives a lot of traffic, S3 can scale to handle that increase in traffic without impacting user experience.
-
Pricing: You are charged based on your usage. There are no fixed costs that you need to pay every month. More details about the pricing is available here.
-
Developer friendly: AWS provides a comprehensive CLI which we can use to interact with all of their services including S3.
Okay, you have convinced me. How do I get started?
Step 0: Prerequisites
Create an AWS Account
Instructions to create an AWS account are available here.
Setup the AWS CLI
We will be using the AWS Command Line Interface (CLI) to interact with S3. Instructions for setting up the AWS CLI are available here
Step 1: Create your site using Jekyll
If you already have a site which you want to host on S3, feel free to skip to the next step.
We will use Jekyll to create our site for this tutorial.
What is Jekyll?
Jekyll is a simple tool for transforming your content into static websites and blogs. You can simply create your content in a format such as Markdown and Jekyll can produce a static website which can served over the Internet.
-
Install Jekyll
gem install jekyllIf you don’t have Ruby installed on your machine, you might have to install that first.
-
Create a new Jekyll site
mkdir my-site cd my-site jekyll new my-jekyll-site -
Generate your site
cd my-jekyll-site
jekyll serve
If everything works correctly, you should see output similar to this:
➜  my-jekyll-site jekyll serve
Configuration file: /home/abhishek/Projects/learn-aws/tutorials/my-jekyll-site/_config.yml
            Source: /home/abhishek/Projects/learn-aws/tutorials/my-jekyll-site
       Destination: /home/abhishek/Projects/learn-aws/tutorials/my-jekyll-site/_site
 Incremental build: disabled. Enable with --incremental
      Generating...
                    done in 0.193 seconds.
 Auto-regeneration: enabled for '/home/abhishek/Projects/learn-aws/tutorials/my-jekyll-site'
    Server address: http://127.0.0.1:4000/
  Server running... press ctrl-c to stop.
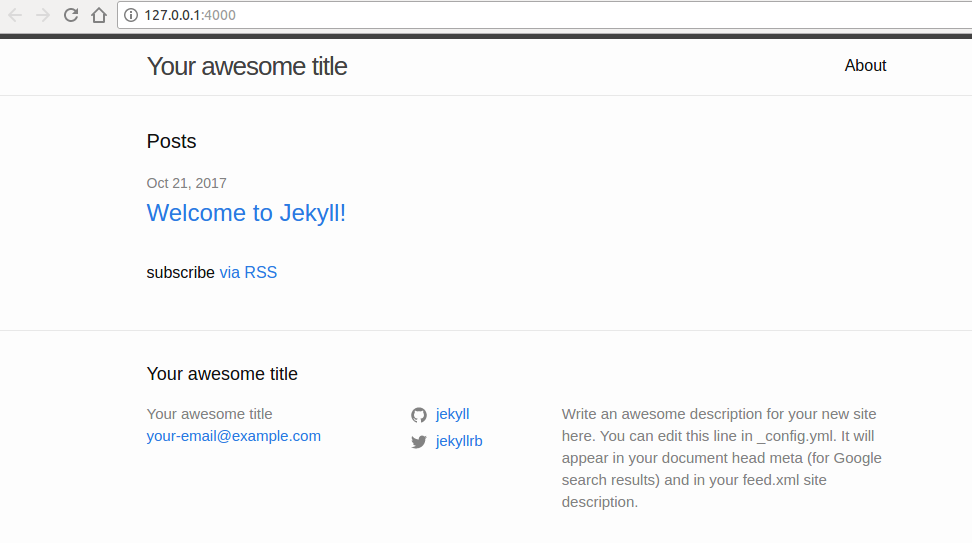
If you open your browser and go to the address http://127.0.0.1:4000/ you should be able to see your site. This is what it looks like:

Step 2: Create a bucket in Amazon S3
We will be using the AWS CLI to interact with S3.
Run aws s3 help at any time to learn more about the different features available to us.
-
Create S3 bucket
It is good practice to name your S3 bucket the same as your site. However, S3 bucket names are required to be globally unique. If the following command throws an error, it could be due to the bucket name not being available.
aws s3 mb s3://your-bucket-name -
Enable Static website
S3 buckets can be used for static websites. We need to enable the feature to be able to use it. S3 static websites are available at http://your-bucket-name.s3-website-us-west-2.amazonaws.com/
aws s3 website s3://your-bucket-name/ --index-document index.html -
Set public access to the bucket
Any objects added to a S3 bucket are private by default. Since we want to use our S3 bucket as a static website we need to make all contents of this bucket public so users will be able to access the site.
-
First, create a file called
policy.jsonwith the following content:{ "Version": "2012-10-17", "Statement": [ { "Sid": "PublicReadGetObject", "Effect": "Allow", "Principal": "*", "Action": "s3:GetObject", "Resource": "arn:aws:s3:::your-bucket-name/*" } ] }Don’t forget to replace
your-bucket-namein the policy with the bucket you created previously. -
Add this policy to your bucket:
 aws s3api put-bucket-policy --bucket bucket-for-my-blog \
 --policy file://policy.json
-
Step 3: Upload to S3
After we have created our S3 bucket, we will go ahead and upload all the required files to S3.
The following command uploads all the static files generated by Jekyll under the _site folder to the S3 bucket you just created.
aws s3 sync _site s3://your-bucket-name/ --delete
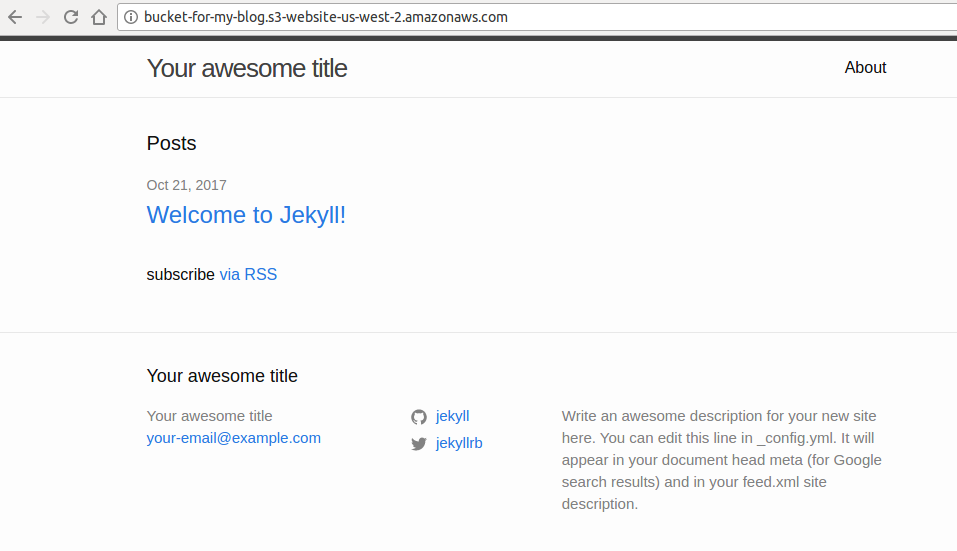
Now, if you navigate to http://your-bucket-name.s3-website-us-west-2.amazonaws.com/, you should be able to see our site similar to what we saw in Step 1.

Conclusion
I hope this tutorial was helpful to understand the benefits of using S3 for hosting static websites. I will write a follow up to this tutorial which will show how to automate deployments to S3 by using a CI/CD tool along with a CDN for better performance.
Please feel free to leave any comments below if you have any questions or feedback.