Introduction to AWS Fargate: How to build and deploy a web application using Docker and Python
Introduction
AWS recently launched Fargate which lets users build and deploy containerized applications without having to manage the underlying servers themselves. Previously, if you wanted to deploy a container on AWS, you would have to first provision a cluster and then deploy your container onto that cluster. This can add a lot of friction as a lot of developers want to be able to deploy their applications as quickly as possible without worrying about the underlying infrastructure.
Fargate makes deploying your containerized applications pretty easy and straightforward.
In this tutorial, we will create a Python web application using Flask and deploy it using Fargate.
If you are interested in learning about how Fargate works internally and how it compares to other AWS services, check out our new blog post here.
Prerequisites
-
virtualenv: Virtualenv is a tool to create isolated python environments. We will be using it to create an isolated environment for our application. Instructions for installation are available here.
-
Docker: We will be using Docker to containerize our python application. More information about Docker is available here.
-
News API: Since we will be building a simple news aggregator application, we need an API from where we can get the data. News API has a free developer tier which you can sign up for and get an API key. You can sign up by visiting this link.
Getting Started
The source code for the application is available at https://github.com/abhishekray07/fargate-web-app.
Create a new directory for the application
mkdir fargate-tutorial
cd fargate-tutorial
Setup a virtualenv for the application
virtualenv env
source env/bin/activate
Create requirements.txt with all the dependencies
Flask==0.12.2
requests
awscli
- Flask is a web framework for Python which makes it easy to create web applications. You can learn more about Flask here.
- The requests library is used to communicate with the News API.
- The AWS CLI will be used in the tutorial for various AWS related operations.
Install the dependencies
Run the following command in the shell to install all the dependencies.
pip install -r requirements.txt
Building and running the web app
Create ‘web’ folder
This folder will store all the code related to our web application.
mkdir web
Create a file __init__.py in the web folder with the following contents:
from flask import Flask
app = Flask(__name__)

@app.route('/')
def hello_world():
    return 'Hello, World!'
In the root directory, create a file named run.py to start the server
#!/usr/bin/python
from web import app
app.run(debug=True, host='0.0.0.0', port=8080)
Start the webserver
To start the server, run the following command in your shell.
python run.py
Once the webserver starts successfully, you should be able to see “Hello, World!” if you navigate to http://0.0.0.0:8080 in your browser.
Now that we have our web application up and running, we will try to integrate it with the News API we signed up for earlier. Go to this link and retrieve your API key.
Replace the contents of ___init__.py with the following:
import requests

from flask import Flask, render_template
app = Flask(__name__)

API_KEY = "YOUR_API_KEY"
NEWS_API_URL = "https://newsapi.org/v2/top-headlines?sources=bbc-news&apiKey=%s" % API_KEY

def get_news_articles():
    # fetch the news articles
    response = requests.get(NEWS_API_URL)

    # return the articles in json format
    return response.json()['articles']

@app.route("/")
def index():
    return str(get_news_articles())
Let’s go through what is happening in the code above:
-
Replace
YOUR_API_KEYwith the API key you received. -
In the
get_news_articlesfunction, we retrieve the articles from the API in JSON format. -
In the
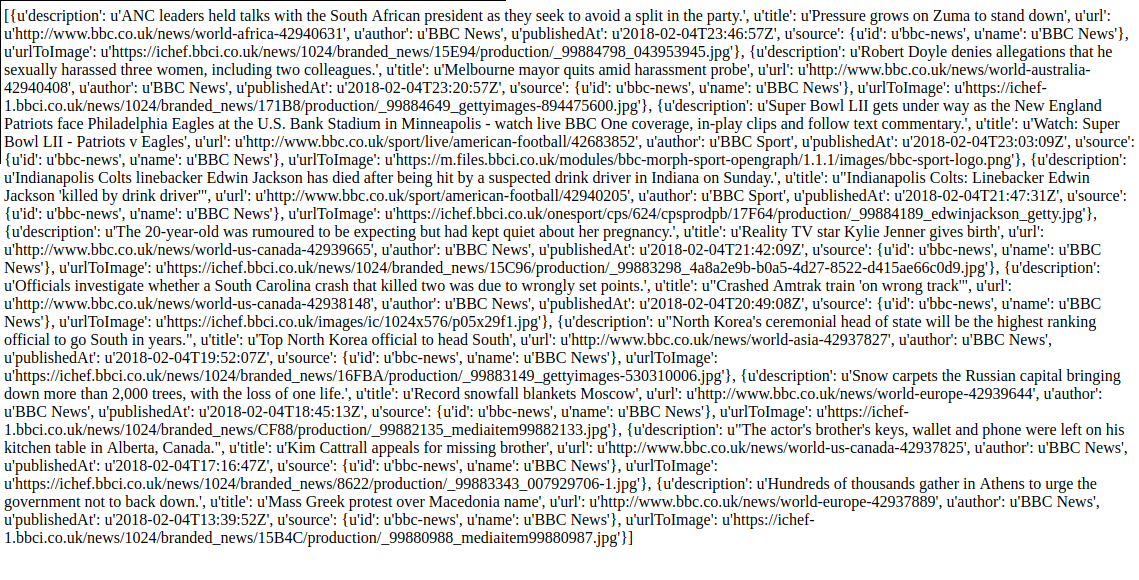
indexfunction, we return the list of articles in the string format so that they can be rendered.
If we were to go to the site in the browser, we should be able to see the list of the articles like this:
Build the application using Docker
In the following steps, we will containerize our application using Docker. This guide is a good starting point to learn more about how to use Docker.
Create a Dockerfile with the following contents:
Create this file in the root directory of the application.
FROM ubuntu:16.04

RUN apt-get update -y && \
    apt-get install -y python-pip python-dev

COPY ./ /app
WORKDIR /app
RUN pip install -r requirements.txt
ENTRYPOINT [ "python" ]
CMD [ "run.py" ]
In the Dockerfile above, we install Python and our application and then specify how we want to run our application in the container.
Build the container
docker build -t fargate-news-aggregator .
Run the command above from the root directory of your application to build a Docker container for your application with the tag fargate-news-aggregator.
Run the container
docker run -p 8080:8080 -t fargate-news-aggregator
Next, we will run the container we created in the previous step. You should be able to see output similar to:
* Running on http://0.0.0.0:8080/ (Press CTRL+C to quit)
* Restarting with stat
* Debugger is active!
* Debugger PIN: 236-035-556
If you navigate to that URL, you should be able to see output similar to what we saw earlier when we ran our web application directly.
Deploying our application using AWS Fargate
In the following steps, we will deploy our container to Amazon’s Elastic Container Repository (ECR) and then launch the application using Fargate.
Create a new repository in ECR
In your shell, run the following command to create a new repository for the application:
aws ecr create-repository --repository-name fargate-news-aggregator
If the command is successful, you should be able to see output similar to:
{
  "repository": {
      "repositoryArn": "arn:aws:ecr:us-west-2:945568844480:repository/fargate-news-aggregator",
      "registryId": "945568844480",
      "repositoryName": "fargate-news-aggregator",
      "repositoryUri": "945568844480.dkr.ecr.us-west-2.amazonaws.com/fargate-news-aggregator",
      "createdAt": 1514318622.0
  }
}
Push container image to ECR
Log in to the AWS website and navigate to the Repositories tab under the Elastic Container Service. You should able to see the repository you just created.

Next, click on the repository. It should bring you to a screen like this.

Now click on View Push Commands to get a list of commands that you need to run to be able to push your image to ECR. Follow the steps as they are given.
Create Fargate Application
First, go to think link https://console.aws.amazon.com/ecs/home?region=us-east-1#/getStarted to get started with creating a new Fargate Application.
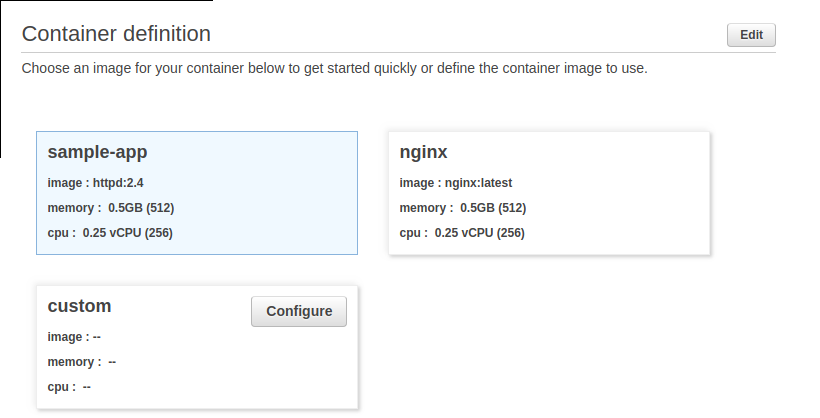
On the next page, under the container definition choose Custom and click on Configure.
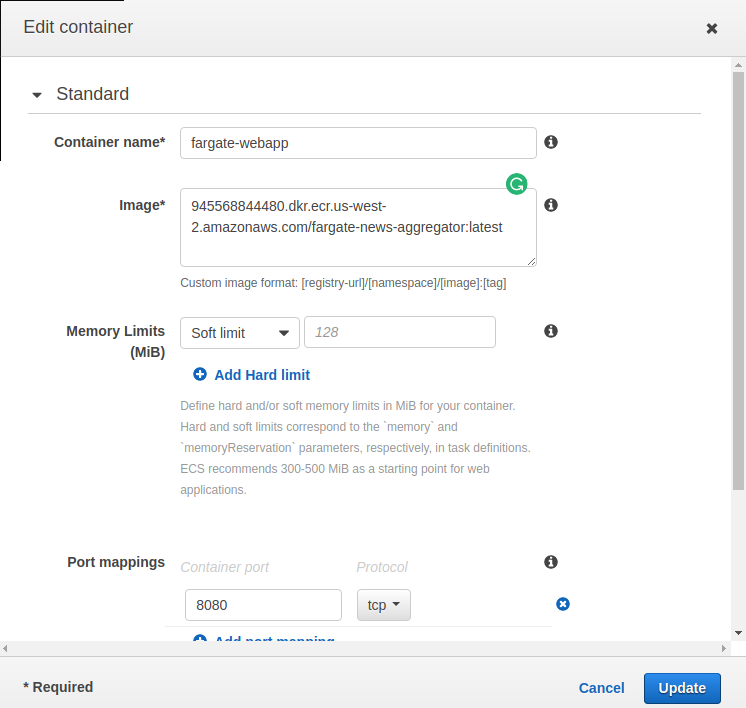
In the popup, enter a name for the container and add the URL to the container image. You should be able to get the URL from ECR. The format of the URL should be similar to the one listed below.
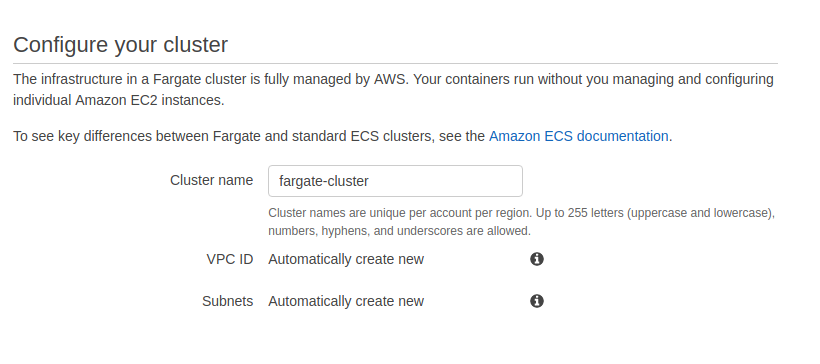
Next, create a cluster by giving it a name.
On the next page, you should be able to see the status of the service you just created. Wait for the steps to complete and then click on View Service.
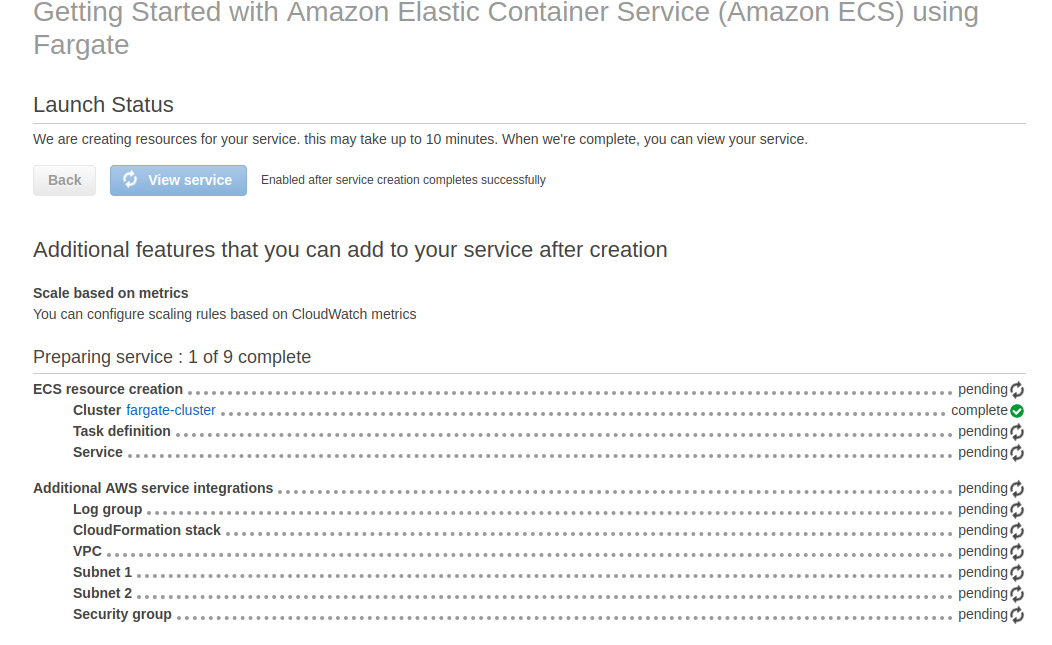
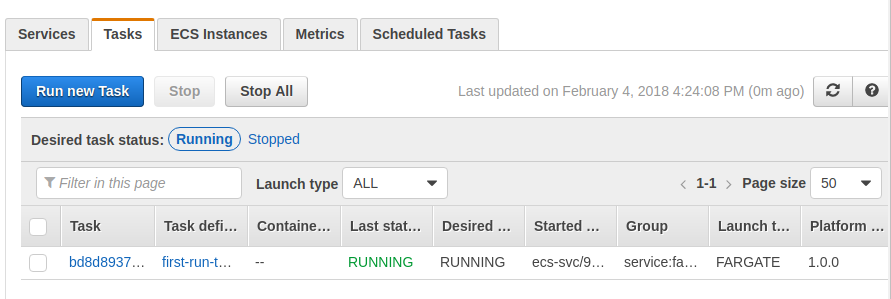
Once on the services page, click on the Tasks tab to see the different tasks running for your application. Click on the task id.
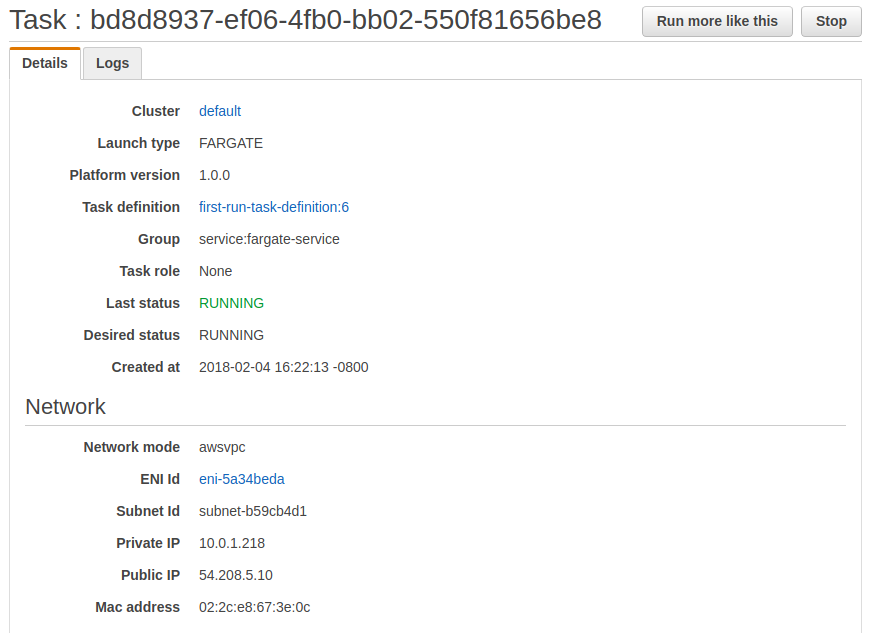
In the Task Details page, you should be able to see the Public IP under the network section. Copy this IP address.
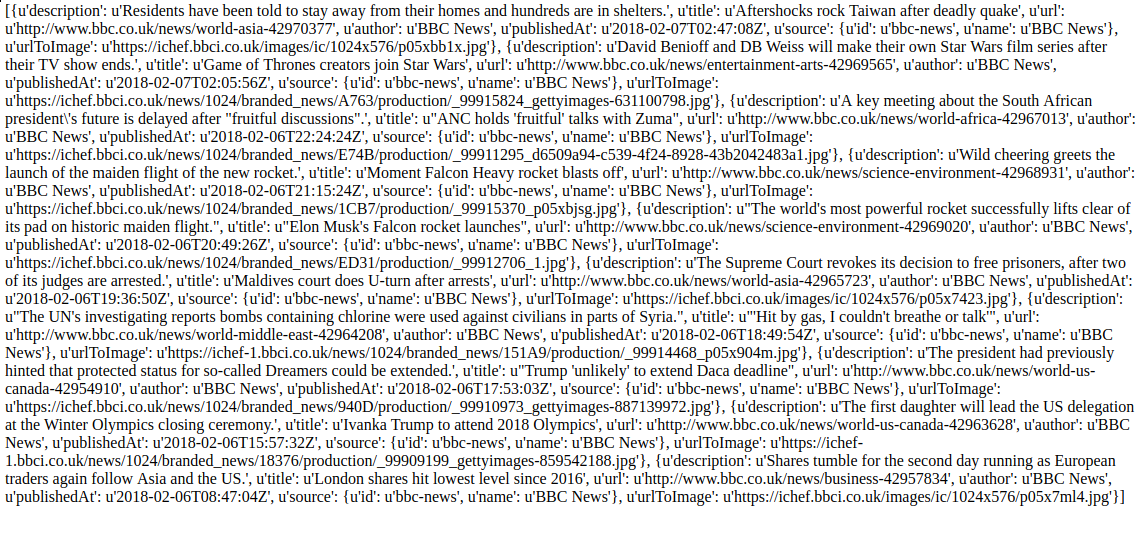
Now, if you go to your browser and point it http://<PUBLIC_IP>:8080/, you should be able to see your application running on Fargate.
Conclusion
In the tutorial above, we saw how easy it is to build and deploy an application using AWS Fargate. We no longer need to worry about provisioning the underlying infrastructure. We can instead focus on building our application and deploying it easily.